
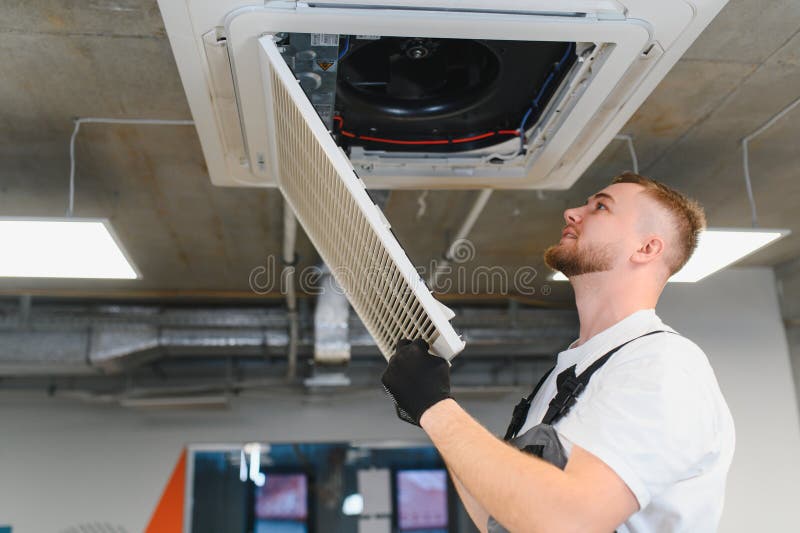
The Right Way to Remove a Dirty HVAC Filter Safely
If you are changing a dirty HVAC filter, the main goal is not just swapping it out quickly. It is to isolate the equipment properly, handle the loaded filter without shaking debris loose, and keep dust from being released back into the space.
That matters in homes, plant rooms and commercial sites alike. A calm, methodical approach protects the equipment, keeps the area cleaner and makes it easier to inspect the system for the next filter change.
Before you start: make the area safe
Start by identifying the unit and confirming which filter needs to be removed. If there are multiple air handlers, return grilles or filter banks, make sure you are working on the correct section before opening anything.
Before touching the filter, isolate the equipment according to the site procedure and the manufacturer’s instructions. Depending on the system, that may mean switching the unit off at the controller, shutting down the fan, and applying lockout or tagout where required by site rules.
It is also worth checking the access area around the filter frame. Clear nearby items, place a clean bag or lined bin close by, and have gloves, a torch and replacement filter ready before opening the panel. This reduces the time the system is open and helps prevent accidental contamination of the space.
If the site has pressure gauges fitted, note the reading before removal. That can help with future monitoring and may show whether the filter is loaded more heavily than expected. As always, follow the filter and equipment manufacturer instructions, and confirm site requirements with the mechanical services engineer or building owner where needed.
Remove the filter without releasing dust
Once the unit is isolated and the access panel is open, support the filter as you slide it out. A loaded filter can be heavy, flexible or partly clogged, so do not jerk it free. Pull slowly and keep it upright where possible to avoid dropping accumulated dust back into the duct or room.
Good handling habits
- •Wear gloves if the filter is visibly dirty or contaminated with fine dust.
- •Keep the filter level and avoid twisting it.
- •Do not tap, shake or blow on the filter to “clean” it before removal.
- •If there is a prefilter and final filter arrangement, remove each one carefully in the correct order.
- •Move the filter directly into the waste bag or carry container rather than setting it down open to the air.
If the filter appears damaged, collapsed or heavily loaded on one side, handle it even more carefully. Broken media or loose seal material can fall away during removal, especially if the frame is lifted or turned abruptly.
For some systems, filters sit behind spring clips, latches or side-access rails. Release these slowly and keep a hand on the filter as you disengage the last fixing point. That way, the filter does not lurch forward and shed dust into the space.
Contain dust during disposal
Dirty filters should be removed from the room with the least possible disturbance. A simple way to do that is to slide the filter straight into a bag or wrap it in plastic sheeting before moving it through occupied areas.
If the filter is very dusty, use a bag large enough to fully contain it without forcing it in. Seal the bag before carrying it away, and avoid leaving open bags near occupied areas, return grilles or doorways. If the site has a designated disposal method for contaminated material, follow that process instead of improvising.
It can also help to wipe down nearby surfaces after the filter is out, especially the frame, access door and internal ledges. Use a vacuum suitable for the site and equipment if required, rather than dry brushing, which can stir dust back into the air.
If the filter was installed in a kitchen, workshop, plant room or other high-dust area, check for dust build-up around the housing. A clean frame helps the new filter seat correctly and reduces the chance of air bypass.
Inspect the housing before fitting the replacement
A filter change is a good time to look for issues that affect airflow and sealing. Before inserting the new filter, check the frame, gasket surfaces, holding clips and access door for damage or distortion.
Look for:
- •gaps where air could bypass the filter
- •bent frames or damaged tracks
- •old gasket material or debris on sealing faces
- •moisture, corrosion or mould growth in the housing
- •signs that the old filter was fitted incorrectly
If the filter seat is not clean and square, the replacement may not seal properly. That can reduce the effectiveness of the filter stage and create extra load on the system. If there is visible damage to the housing or a persistent sealing problem, it may need attention from a qualified mechanical services contractor.
For commercial systems, it is worth checking whether the installed filter grade still suits the application. Standards such as AS 1668.2:2024 may be relevant to ventilation arrangements, but site requirements should always be confirmed with the mechanical services engineer or building owner.
Install the new filter correctly
Before fitting the replacement, check the airflow direction arrow on the frame and make sure it matches the system. It sounds simple, but reversed filters are a common installation error and can lead to poor performance.
When positioning the filter, seat it evenly in the frame or track. Do not force it into place if it feels tight. If it is the wrong size, it can buckle, leave a gap or be damaged during installation. If you need help checking sizing, how to measure an air filter is a useful starting point.
If the filter uses a gasket or sealing edge, make sure it sits flat and continuous. Refit clips, latches or access panels securely, then restore the unit to service only when everything is closed and checked.
Helpful checks after installation
- •Confirm the filter is seated squarely.
- •Check that access doors are fully closed.
- •Make sure tools and packaging are removed from the unit.
- •Observe the system on start-up for unusual noise or air leakage.
- •Record the replacement date and the pressure drop reading if your site tracks these values.
Choosing the right replacement filter for the job
A safe removal process is only part of the picture. The replacement filter also needs to suit the equipment, airflow requirements and environment. That includes the correct dimensions, frame style and filter class for the system.
If you are comparing filter ratings, keep in mind that MERV, EN 779 and ISO 16890 do not convert directly. In Australia, you may still see older EN 779 classes such as G3, G4 and F5-F9 used in product descriptions, even though ISO 16890 is now widely referenced. For finer filtration applications, HEPA performance is defined differently again, with H13 at at least 99.95% and H14 at at least 99.995% efficiency at the most penetrating particle size under EN 1822.
Some filters are designed to be washable - check the product instructions before attempting to clean and reuse one. Others are intended for single use only. Using the wrong cleaning method can damage the media or the frame.
If you are not sure which filter suits the unit, our products and custom air filters pages can help, or you can ask for guidance based on your equipment and site conditions.
When to call in support
If a filter bank is awkward to access, heavily loaded, damaged or part of a larger maintenance shutdown, it is sensible to use a qualified contractor. The same applies if there are signs of poor sealing, repeated premature loading or a filter arrangement that no longer matches the system.
Total Air Filtration is a family-owned air filter manufacturer and supplier based in Hillcrest, Brisbane QLD, and we can help with standard and custom filter needs across a range of applications. For help choosing the right replacement or arranging site support, see filter servicing, commercial filter servicing or industries we supply.
If you need the right filter made or supplied, call 07 3800 3448 or request a quote.
Written by
The Total Air Filtration Team
General information only — always follow the instructions for your filter and system. Have questions about this article? We're here to help.