
How to Photograph an Existing Filter So a Manufacturer Can Match It Accurately
If you need a replacement for an existing filter but the part number is missing or unreadable, good photos can make the difference between a quick match and a long guessing game. The right images let a manufacturer check the frame, seal, media and dimensions before anyone orders a replacement.
This guide shows exactly what to photograph, how to frame each shot, and what details matter most for homeowners, property managers and contractors.
Start with a clear overall photo
Begin with a straight-on photo of the whole filter in good light. This gives the manufacturer an immediate sense of the filter’s shape, size and construction.
Make sure the image shows:
- •The full face of the filter
- •The entire outer frame
- •Any handle, gasket or edge detail
- •The orientation of the pleats or media
If the filter is still installed, try to photograph it before removing it. A picture of the filter in place can help identify whether it sits in a return air grille, fan coil unit, rooftop unit or another housing.
Use daylight or a bright torch, and avoid shadows across the face of the filter. If the photo is blurry, the edge details that matter most can disappear.
Capture the frame corners and edge profile
Frame corners are one of the fastest ways to identify an unknown filter. A corner close-up can show whether the frame is cardboard, metal, plastic or another construction, and whether the joints are glued, folded, riveted or sealed.
Photograph each corner if possible, especially where the frame meets at the corners. The manufacturer may be looking for:
- •Frame material and thickness
- •Corner construction
- •Any embossing, crimps or folded edges
- •Signs of damage, swelling or distortion
A side-on shot of one edge is also useful because it shows the overall profile of the filter. This is especially important when the filter sits in a shallow slot or a tighter housing.
If the filter has a rigid frame, try to include a side photo that shows how deep the frame sits compared with the media. If it is a pocket, panel or pleated filter, the edge profile can help distinguish between similar-looking products.
Photograph labels, markings and any part numbers
If there is a label, sticker or printed marking, make sure it is photographed clearly and in full. Even a partial code can help narrow down the match.
Useful details to capture include:
- •Part number or model code
- •Brand name
- •Size markings
- •Direction arrows
- •Airflow direction notes
- •Any material or rating information printed on the filter
Take one photo of the label from a distance, then a second close-up if the first is not sharp enough to read. If the label is faded, use a torch from the side rather than shining directly on it, which can wash out faint print.
If the filter has writing on the frame edge, don’t overlook it. Many useful marks are tucked around the perimeter rather than on the main face.
Show the seal edges and gasket details
Seal type is often overlooked, but it can be one of the most important clues when matching a replacement filter. The way the filter seals into the frame or housing affects fit and performance.
Photograph:
- •Any foam gasket on the perimeter
- •Rubber or vinyl seals
- •Moulded edge seals
- •Places where the seal meets the housing
- •Worn, compressed or damaged sections
If the filter has a gasket, take a close photo of the gasket cross-section if you can. That helps the manufacturer understand whether it is a flat seal, a compressible strip or a profile that fits into a specific track.
A photo of the installed filter with the access door or housing open can also be useful, because it shows how the seal sits in relation to the unit. If the filter is part of a system governed by AS 1668.2:2024 or another site-specific requirement, confirm the exact needs with the mechanical services engineer or building owner.
Photograph the media itself and its pleat profile
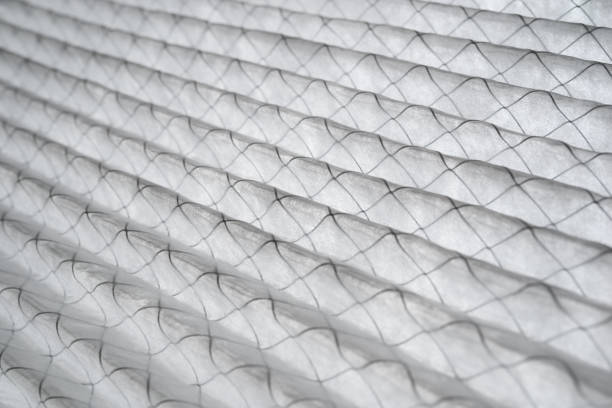
The media profile can tell a manufacturer a lot about the filter type. A close image of the filter media helps distinguish between flat media, pleated media, rigid media and other constructions.
Focus on:
- •Pleat depth and spacing
- •Whether the pleats are uniform or irregular
- •The colour and texture of the media
- •Whether the media is bonded, supported or loose
- •Any visible separators, mesh or backing
Take one close-up from the front and one from the side. The side view is especially useful for showing pleat depth, media density and how the filter is built through its thickness.
If the media is damaged or heavily loaded with dust, try to photograph an undamaged section as well. That gives a clearer picture of the original construction. If the filter appears to be washable, only treat it as such if the product instructions say so.
Measure alongside the photos
Photos are most useful when they are paired with accurate measurements. If you are not sure how to record them, use how to measure an air filter as a guide.
Measure the full outside dimensions of the filter and note any special features, such as:
- •Recessed edges
- •Lip depth
- •Gasket thickness
- •Frame depth
- •Irregular corners
It helps to include a tape measure or ruler in at least one photo so the size is clear. Just make sure the measuring tool does not block the corner, label or seal detail.
For odd-shaped or custom filters, a few extra shots from different angles can save time. If the filter is non-standard, custom air filters may be the right path.
What not to leave out
A single photo from the front is often not enough. When a manufacturer is trying to identify an unknown filter, these missing details can slow things down:
- •The reverse side of the filter
- •Any hidden label or code
- •The edge where the filter sits in the frame
- •A close-up of the seal
- •A side view showing depth and profile
If the filter has two different faces, photograph both. Some filters look similar from the front but differ on the back, especially where the media support, seal or airflow direction is concerned.
When the filter is part of a commercial system, extra context is helpful. A photo of the unit nameplate, access door or nearby signage can help the manufacturer understand the installation type before recommending a match. If the filters are part of an ongoing maintenance plan, filter servicing or commercial filter servicing may also be relevant.
Send the photos in a way that is easy to review
Once you have the photos, send them together with the measured dimensions and any notes you have about the installation.
Include:
- •The site name or location
- •The equipment type if known
- •The filter dimensions
- •Any label text or part numbers
- •A brief note about where the filter was found
If you are a contractor or property manager and you are unsure whether the filter is a standard item or a special build, ask for help early. That is often faster than guessing and ordering the wrong size. You can also look through our products to get a sense of the filter types we supply across different applications.
Need help identifying a filter?
Total Air Filtration is a family-owned air filter manufacturer and supplier based in Hillcrest, Brisbane QLD, and we can help match many unknown filters from good photos and measurements.
If you want help identifying a replacement, call 07 3800 3448 or request a quote. You can also contact us with your photos, and we will take a look.
Written by
The Total Air Filtration Team
General information only — always follow the instructions for your filter and system. Have questions about this article? We're here to help.