
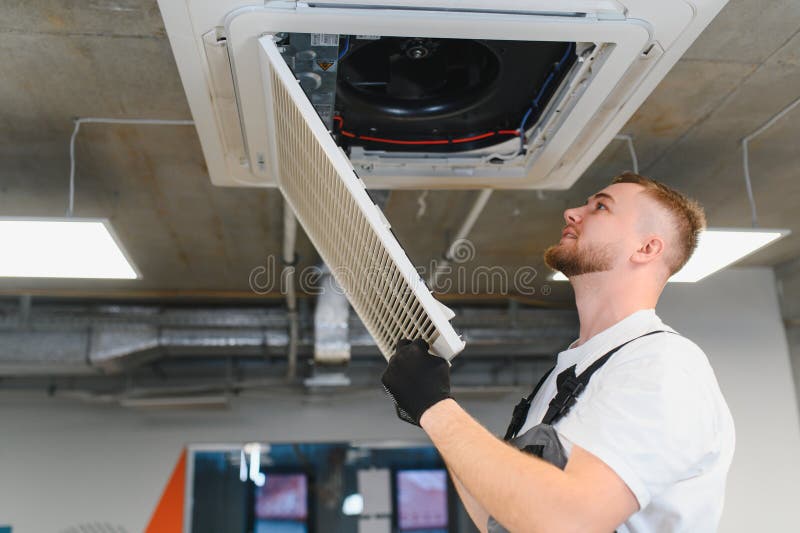
How to Inspect the Filter Rails and Gasket Track During Every Change-Out
When a filter change-out goes smoothly, it is easy to focus on the filter itself and move on. But recurring leakage, uneven loading and poor seating often start with the rail and gasket area, not the media. A quick, careful inspection of the frame, channels and contact surfaces during every change-out can help you catch small issues before they turn into repeated bypass, rattling or hard-to-seat filters.
Why the rails and gasket track matter
The filter is only as effective as the seal around it. If the frame is bent, the track is damaged or old gasket material is left behind, air can pass around the filter instead of through it.
For facility managers and maintenance teams, this means the change-out is not complete until the housing and contact points are checked. A clean, flat and intact seating surface helps the new filter sit properly and perform as intended for that system.
This is especially important in systems with repeated dust loading, vibration, door movement or frequent maintenance access. If you are working to site requirements under AS 1668.2:2024, confirm any specific sealing or installation expectations with the mechanical services engineer or building owner.
What to look for on the rails
Filter rails carry the filter into position and keep it aligned. Even small defects can affect fit and create gaps.
Check for damage and distortion
Look closely along the full length of the rails for:
- •Bent or twisted sections
- •Dents, cracks or loosened fixings
- •Corrosion, rust or flaking coating
- •Signs that the rail has shifted out of square
- •Wear marks where the filter has been rubbing
If the rail is damaged, the filter may rock, sit proud on one side or fail to compress the gasket evenly. A filter that looks fine on the bench can still leak if the rail is out of alignment.
Confirm the rail is clean
Dust build-up, grease and old gasket remnants can stop the filter from seating properly. Wipe the rails clean before installing the replacement filter and check that no loose debris is left behind.
If the system sees heavy dust or oily contamination, the rails may need more than a quick wipe. Remove any buildup that could prevent full contact with the filter frame or gasket.
Inspect the gasket track and contact surfaces
The gasket track is where the filter seals against the frame, door or clamping surface. This is the area most likely to cause recurring bypass if it is overlooked.
Look for leftover gasket material
After removing the old filter, check whether any compressed gasket, adhesive residue or fragments are still stuck in the track. Even thin remnants can create uneven pressure and stop the new gasket from landing flat.
Pay attention to corners and joins, where material often hides. If you are changing from one filter type to another, confirm the sealing surface still suits the new frame style and gasket profile.
Check for scratches, dents and high spots
Run your eye and hand carefully along the contact surface. You are looking for:
- •Scratches that run across the sealing face
- •Raised edges from previous damage
- •Dents or flattened areas from over-tightening
- •Corrosion pits or rough patches
- •Any obstruction that would stop even compression
A small high spot can create a gap large enough to cause repeat leakage. If a surface cannot be cleaned back to a smooth, even finish, it may need repair before the next filter is installed.
Check the track depth and alignment
The filter should sit squarely in the track without forcing it into place. If the channel is too tight, too shallow or uneven, the filter may twist during installation. That can lead to poor sealing, difficult removal next time and visible wear on the frame.
Signs the filter is not seating properly
A good visual check during change-out can save time later. If the filter has been seating badly, there are usually clues on the old unit and in the housing.
Look for:
- •Uneven compression on the gasket
- •Dust trails around the frame edges
- •Shiny rub marks where the filter has moved
- •Air bypass marks or dirt on the downstream side of the housing
- •Difficulty closing the access door or clamping hardware
If the old filter was clearly compressed on one side and loose on the other, the issue may be the frame rather than the filter. In that case, replacing the filter alone will not fix the recurring problem.
How to handle common field issues
Not every problem needs major repair, but it does need a deliberate response. During the change-out, separate what is safe to clean from what needs escalation.
Clean, repair or replace?
Use this practical approach:
- •Clean light dust, loose debris and removable residue from the rail and track
- •Repair minor fixings, loose fasteners or small alignment issues where appropriate
- •Replace damaged rails, warped frames or badly corroded components
- •Escalate structural concerns to the mechanical services team
If the system uses a gasketed filter, make sure the new gasket is suitable for the housing and installed as directed by the product instructions. Some filters are designed to be washable - check the product instructions before cleaning or reusing any component.
If you need help matching a replacement to the existing housing, how to measure an air filter is a useful starting point, especially when the original unit is worn or hard to read.
Make the inspection part of your change-out routine
A repeatable process keeps the inspection consistent, even when different staff are on site. The goal is not to add unnecessary steps, but to make sure the same contact surfaces are checked every time.
A useful site routine is to:
- •Remove the old filter carefully so the housing is not damaged
- •Inspect the rail, channel and sealing face before cleaning
- •Clear out debris and old gasket residue
- •Check the replacement filter for correct size and frame condition
- •Seat the filter squarely and confirm even contact all around
- •Recheck the clamp, latch or access door for full closure
Where pressure gauges or monitoring points are fitted, monitor pressure drop as part of your site’s maintenance process. The inspection frequency should suit the system, dust load and operating conditions, and you should follow the filter and equipment manufacturer instructions.
If the same leakage keeps returning, the issue may be the housing design, the filter specification or the sealing method. In that case, it can help to review the full application with the supplier rather than changing filters in isolation. Our filter servicing and commercial filter servicing pages explain how we support practical maintenance needs.
When to ask for a replacement or custom solution
Some housings simply do not seal well with off-the-shelf filters if the frame has been modified, worn or repaired over time. If the rails or gasket track are no longer giving a reliable fit, a different filter size, frame style or sealing arrangement may be needed.
That is where a proper match matters. Total Air Filtration, a family-owned air filter manufacturer and supplier in Hillcrest, Brisbane QLD, established 2009, can supply standard filters or make the right custom option for your housing and application. You can also review our products, custom air filters or the industries we supply to see what suits your site.
If you want a second set of eyes on a stubborn seating issue, or need help choosing the right replacement, call 07 3800 3448 or request a quote.
Written by
The Total Air Filtration Team
General information only — always follow the instructions for your filter and system. Have questions about this article? We're here to help.