
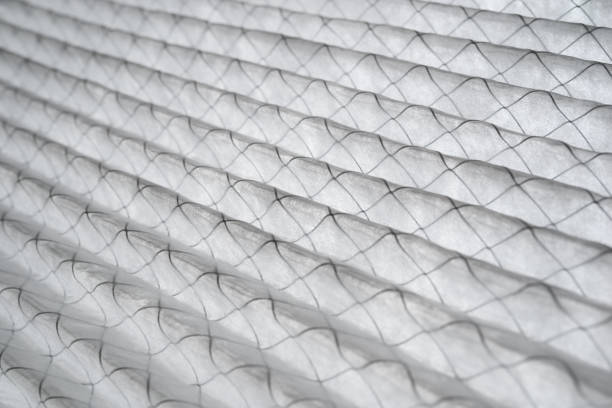
How to Inspect an Air Filter Without Damaging It
If you need to check an air filter, the aim is to inspect it without bending the frame, tearing the media or disturbing dust that has built up on the surface. A careful check can help you spot dirt loading, damage and fit issues early, before they affect airflow or place extra strain on the system.
This guide is written for homeowners, facility managers and mechanical contractors who want a practical way to assess filters in place or after removal. If you are unsure what type of filter is installed, or whether the right product is being used for the system, you can also review our products or compare against how to measure an air filter.
Before you start: prepare the area and protect the filter
Start by switching the system off, or following your site procedure so the fan is not drawing air while the filter is removed. That reduces dust movement and makes the inspection easier and cleaner.
Have a clean work area ready before you open the access panel. If the filter is heavily dust-loaded, handle it gently so loose debris does not fall back into the duct, fan section or return air compartment.
A few simple precautions make a big difference:
- •Wash or sanitise your hands before handling the filter.
- •Use clean gloves if the site procedure requires them.
- •Open the access door slowly so you can see how the filter is seated.
- •Avoid placing tools on top of the filter or leaning it against rough surfaces.
- •Keep the filter flat when possible, especially if it has a cardboard or lightweight frame.
If the filter is in a commercial system, note the equipment details and the date of inspection so you can compare future checks. Inspection frequency depends on the system, site conditions and dust load, and you should follow the filter and equipment manufacturer instructions. Where gauges are fitted, monitor pressure drop as part of routine maintenance.
Check for dirt loading without disturbing the media
The most common reason to inspect a filter is to see whether it is becoming loaded with dust and debris. You do not need to shake or tap the filter to find this out.
Look at the exposed face of the media while it is still installed if access allows. A loaded filter often shows a darkened surface, visible matting of dust, or uneven loading where one area is taking more air than another.
What to look for:
- •A heavy layer of dust on the upstream face.
- •Uneven discolouration across the media.
- •Dust streaks that suggest bypass air or turbulence.
- •Collapsed pleats or compressed pockets in pleated filters.
- •Debris accumulation around the frame edges.
If the filter has a pressure gauge or manometer associated with the system, use that reading alongside the visual check. A filter can look acceptable at a glance but still be restricting airflow, especially in dusty environments or busy commercial sites.
Do not blow compressed air through the filter to “clean” it unless the product instructions specifically say it is suitable. Some filters are designed to be washable - check the product instructions before attempting any cleaning or reuse.
Inspect the media for tears, pinholes and separation
A damaged filter may let air pass through an unintended opening rather than through the full media area. That means the system can draw air around weak points instead of through the filter surface.
Hold the filter at a slight angle under good light so you can see the media clearly. If the filter is pleated, open the pleats gently with your fingers only enough to check for damage; do not force them apart.
Check for:
- •Tears in the media, especially near the centre where loading is greatest.
- •Pinholes, splits or frayed edges.
- •Media separating from the frame or sealing edge.
- •Broken pleats or crushed sections.
- •Loose fibres, sagging pockets or an uneven surface.
For higher efficiency filters, even a small defect matters because the air can follow the path of least resistance. If you find a tear or separation, do not continue using the filter as though it is intact. Replace it with the correct product for the application, and if the cause is unclear, check whether the filter has been fitted against a rough edge or forced into the frame.
If you are working with HEPA products, handle them with extra care. HEPA H13 filters are at least 99.95% efficient and H14 filters are at least 99.995% efficient at the most penetrating particle size under EN 1822. Those ratings are about filter performance, not about how rough handling should be during inspection.
Check the frame, gasket and corners for damage
A filter can look fine on the surface but still leak if the frame is bent, the corners are crushed or the gasket is damaged. This is especially important in systems where the filter must seat tightly in a rack or holding frame.
Examine the outer frame all the way around:
- •Look for warped corners or a bowed frame.
- •Check for cracks in plastic or cardboard frames.
- •Inspect metal frames for dents, sharp edges or corrosion.
- •Confirm that the gasket is continuous and not torn, flattened or missing pieces.
- •Make sure the seal edge is clean and free from heavy dust build-up.
If the frame is damaged, the filter may not sit squarely and air may bypass around the edges. That can reduce the effectiveness of the installed filter even if the media itself is still intact.
For systems designed around specific standards or project requirements, confirm the site specification with the mechanical services engineer or building owner. If you are working to AS 1668.2:2024 requirements, the filter selection and installation details should be checked against the system design rather than assumed.
Confirm fit before you close the access panel
A filter that is the wrong size, or one that is poorly seated, can cause problems even when it is new. Before closing the access panel, confirm the filter sits fully in the frame without bowing, gaps or visible distortion.
A proper fit should show:
- •Even contact all the way around the frame.
- •No visible daylight around the edges where air could bypass.
- •No forced bending to make the filter fit.
- •The correct orientation for airflow direction arrows, if marked.
- •A secure position that does not shift when the panel is closed.
If a filter is too small, it may rattle, tilt or allow air to pass around it. If it is too large, the frame can buckle or the seal may not engage properly. In both cases, the system may not perform as intended.
When in doubt, check the product dimensions carefully before ordering a replacement. If you need a custom size, custom air filters may be the best option for a non-standard opening or specialist equipment.
What to do after inspection
Once you have checked the filter, decide whether it can stay in service, needs closer monitoring, or should be replaced. A filter may be acceptable to leave in place if it is clean enough, undamaged and properly seated. It should be replaced if you find tears, frame damage, collapsed media or evidence of bypass.
After reinstalling or replacing the filter:
- •Close and secure the access panel.
- •Restore the system according to site procedure.
- •Check that airflow sounds normal and the filter area is sealed.
- •Record what you found, especially if damage was caused by poor fit or handling.
For commercial sites, it is often worth including filter checks in planned maintenance visits so issues are found before they affect the wider system. If you need support with ongoing maintenance, see our filter servicing and commercial filter servicing options.
When to replace rather than inspect again
Inspection is useful, but it is not a substitute for replacing a filter that is physically damaged or no longer suitable for the system. Replace the filter if you see:
- •A tear or hole in the media.
- •A damaged or deformed frame.
- •A missing or failed seal.
- •Collapse, separation or severe distortion.
- •Persistent bypass caused by a poor fit.
If the filter type is not clear, or the system has changed since the last service, it may be better to verify the specification before installing another unit. That is particularly important in commercial or industrial settings where dust load, equipment arrangement and site conditions can vary significantly.
Need the right filter for the job?
Total Air Filtration is a family-owned air filter manufacturer and supplier in Hillcrest, Brisbane QLD. If you need a replacement, a custom size or help matching a filter to your equipment, call 07 3800 3448 or request a quote.
You can also browse our products or contact us if you want help checking fit, dimensions or the most suitable filter for your application.
Written by
The Total Air Filtration Team
General information only — always follow the instructions for your filter and system. Have questions about this article? We're here to help.